3.29.2010

Fettuccine Alfredo

Growing up I was a picky eater. While my family would have spaghetti and meatballs, I would have buttered noodles with salt, no pepper. I even have photos documenting me trying my first bite of a BLT sandwich. It was a big deal! During this stage of my life, my orders at restaurants were pretty predictable. For a long time I would only order cheese pizza, then when I got to high school my friends would want to eat at Mexican restaurants, so I eventually learned to like chicken quesadillas. Each year, the night before the women’s tennis state tournament, the team would all go out to eat at Olive Garden, so I learned to order their chicken alfredo. Until about my senior year of high school, those were my general orders and I didn’t venture beyond them.

The interesting thing is, once I did venture beyond them I have not gone back since. Suddenly those flavors of chicken and cheese were monotonous, without excitement or dimension. Besides, I figured every restaurant has them, so why order something that I can get anywhere? I don’t think I could tell you the last time I ordered chicken alfredo for myself. I had never made it either, until out of the blue I decided to last Friday night.

mI really have no idea what caused my sudden urge. I wanted pasta that night and I wanted to use one of the zucchinis I bought on sale, but how that led to alfredo sauce, I’m not sure. Perhaps because I’m always trying to make new things and alfredo was one that I hadn’t tried? I don’t know, but what I do know is that I will be making this sauce again. It was simple, full of flavor, delightfully creamy, and, for an alfredo sauce, pretty healthy. Truly! The sauce can be made all in one pot and by the time your pasta and chicken are cooked, it will be ready too. I started with just ½ tablespoon of butter in a medium saucepan and cooked it until brown to give the sauce a rich flavor. I then added the garlic and cooked for 30 seconds, whisked in the flour so the sauce would be able to thicken, added skim milk, some chicken stock for extra flavor, and parmesan cheese to finish it off. Simple and satisfying. If you’ve been like me with your nose turned up at chicken alfredo, it’s time to lower it down and take a good whiff of steamy pasta soaking in a bath of creamy cheese sauce. No, the flavors aren’t groundbreaking, but you cannot deny that they’re good and if you’re a mom or dad with limited time, picky eaters, and a desire to feed your little ones something healthy, try making this—I think you’ll be happy with the results!

Chicken Alfredo with Whole Wheat pasta and Zucchini Ribbons

My notes: If you are feeding this to kids you might want to peal the zucchini so it can be “camouflaged” and hide in the pasta. I know it’s deceitful, but I think it’s OK in this case. You could even take it one step further and steam some cauliflower and puree it with the sauce. I doubt anyone would be the wiser. Also, I used butter instead of olive oil because I believe you can get a much richer flavor by browning the butter than using olive oil, which you need here since the rest of the ingredients are rather “light.” Finally, if you are making this for dinner guests and want to give it the “wow” factor, I might add a couple of drops of white truffle oil.

Serves 2-4 depending on whether you’re serving children, adults, or ravenous male teenagers

2 4-6oz. chicken breasts

1 zucchini, julienned

olive oil

salt and pepper

Whole-wheat fettuccine 1-1 ¼ inch wide circle of pasta in your fist

Sauce:

½ tablespoon of butter

2 good size cloves of garlic, peeled and minced

1 ½ tablespoons all purpose flour

½ cup of low sodium chicken stock

1 cup of milk (I used skim, but if you want to use 2% or whole feel free)

Salt and fresh cracked pepper

1/4-1/3 cup freshly grated parmesan cheese (use less to keep it healthy, more if you want to up the flavor)

In a medium saucepan melt the ½ tablespoon of butter and cook on medium heat until it starts to brown, about five minutes. While the butter melts, fill up your pasta pot with water, season the water generously with salt, cover the pot with its lid, and bring to a boil. When the butter has turned a caramel colored brown add the mince garlic, cook for thirty seconds, stirring twice, and then add 1 ½ T. of flour and stir to incorporate. Turn heat to low and add the chicken stock and then the milk. Cook over low to medium low heat, stirring occasionally, until the sauce is to your desired thickness. Stir in the grated parmesan so it melts. While your sauce is cooking, heat your sauté pan with olive oil over medium high heat, butterfly your chicken breasts or pound them down so they are about ½ inch thick, season them with salt and pepper, and cook them in the sauté pan until golden brown on both sides and cooked through (180 degrees F). While your chicken is cooking, your pasta water should start to boil, add your pasta then, and cook until it’s al dente. Once your chicken is cooked, remove from pan and let it cool while you add the zucchini ribbons for a quick sauté. Add the zucchini and the finished sauce to the drained pasta. Cut the chicken into bite size pieces and serve!

3.21.2010

Match Day Breakfast


Scott with his match letter!
What a day! Thursday, March 18, was "Match Day." Match Day is the day in which every 4th year medical student in the country finds out what residency program they have been matched to. Back in February, after lots of prayer, we submitted our rank list of residencies and waited patiently anxiously for Match Day which seemed so far away. In the weeks before match day we prepared ourselves to be happy with, and even to expect, our second or third choice so we would not be disappointed if we didn't get our first choice, Duke. Since Duke is one of the more competitive programs in the country to get into, we felt it was very reasonable to not expect to actually get in there.

But then all of the sudden Match Day snuck up on us and it was here! Suddenly I was sitting next to Scott with an envelope in his hands watching him open it. He unfolded the eight and a half by eleven piece of paper and we scanned the page for the place where we would be spending the next three years of our life! “Duke . . .” I heard Scott say softly, “Really? Where? Did we get into Duke?!” I questioned taking the piece of paper so I could better examine it while our parents watched us waiting to hear us clearly announce where we were going. There it was, “Duke University Medical Center” printed three lines down, “I think we’re going to Duke” I announced still not sure that’s really where we were going and half wondering if Duke was only printed there to tell us we did not get our first choice. I checked the paper again, there were no other program names listed and I realized that we were indeed matched to Duke!!! “Ahh! It’s Duke!” I squealed, and hugged and kissed Scott who had been sitting quietly in shock. Our mom’s started crying and hugged us and our dads beamed proudly. It was such happy and wonderful moment and it proved to us that God totally knew what he was doing all along (you'll have to ask me for that story, it's too long to put here)! Praise Him!

We promptly went out and bought Scott some Duke gear!

Now I love to cook and entertain, so when my mom said she was sick of hotel breakfasts it was the perfect excuse for me to play in the kitchen and try to make some new delicious thing for our families. I daydreamed of flavor combinations for several days finally deciding what to make on Wednesday night. Recently I’ve noticed poached eggs topping everything, from salads to pizzas to soups and I’ve wanted to try poached eggs over a wilted arugula salad topped with prociutto and either something sour (like pickled shallots) or sweet (like candied pecans) to give a nice point of contrast to the egg and prociutto. Well, such a salad would not do for either one of our dads (they’re more conservative eaters) and it would not do for breakfast so I transformed it. I reduced the amount of lettuce, gave the dish a base with a white bean and thyme waffle, and added some sautéed veggies that one often finds in omelets or frittatas. I upped the flavor components by slow roasting roma tomatoes, adding bacon (hey, I can’t afford prociutto), sautéing mushrooms and a sweet red onion in the bacon juices until the mushrooms browned and the onion turned truly sweet. I deglazed the sauté pan with balsamic vinegar and then added maple syrup and olive oil to make a dressing to wilt the lettuce and further season the vegetables. The flavors were right on point. The different flavors of the earthy mushrooms and white bean waffles, rich bacon, tangy tomatoes, sweet onions and maple syrup (a nod to the traditional waffle topping), fresh asparagus, mellow egg, and pop of balsamic vinegar all gave the dish great depth, interest, and served to bring out contrasting flavors. Our families heartily gave the dish their approval saying, “This is so much better than anything we could have gotten in a restaurant” and “I don’t want this to end, ever! It is so good!” Ahh, music to my ears! I also served caramel rolls for something sweet and bready and strawberry sorbet with strawberries to finish the meal on a light, fresh note.

The dish sans the poached egg. I was too worried about serving people promptly to take a picture of one with the egg on top! Whoops!

The empty plate is for my brother who is an extremely picky eater. He had a caramel roll and peanut butter toast. ;)

Match Day Breakfast

Ok, so a couple of quick notes. First, if you can’t make the waffles due to lack of food processor or waffle iron I would just use some good bread toasted up. Feel free to sub in other types of mushrooms or shallots for the red onion or broccoli for the asparagus depending on what is on sale when you make this. Also, if you’ve never poached eggs before doing a large number at a time can be overwhelming so just fry some up over easy and you’ll end up with a similar result. (I had to do this b/c we were out of vinegar and it was too hard for me to poach them without it.) Finally, I think that if you have white balsamic vinegar you should use that as the dark brown muted the color of my vegetables and it wasn’t quite as pretty.

Waffles:

1 15oz can of white beans, rinsed and drained

1 tsp. dried thyme or fresh

½ cup chicken stock

Salt and pepper

1 ½ cups flour

1 tablespoon baking powder

1 tsp. sugar

½ tsp sea salt or ¼ tsp table salt

2 eggs

1 cup milk

3 tablespoons olive oil

Eggs:

6 eggs

1 ½ quarts (6 cups) water

¼ cup white vinegar (You won’t taste this! It just helps the egg whites to coagulate!)

Vegetable salad:

8 roma tomatoes

6 strips of bacon (not the small microwavable kind!) cut into ½ inch bits

8 oz. of fresh mushrooms (I used button)

1 medium red onion

1 clove garlic, minced

½ lb (8oz or ½ a bunch) of asparagus, ends trimmed and cut into bite-size pieces

3 tablespoons balsamic vinegar (see note above)

1 well-rounded tablespoon of pure maple syrup

1-2 tablespoons of extra virgin olive oil

salt and pepper

½ bag of arugula or spring greens mix lettuce, about 2.5 oz.

Parmesan cheese

Game plan:

The night before make the waffles, roast the tomatoes, and sauté the bacon, mushrooms, and onions. Leave the tomatoes in the oven overnight and cover and refrigerate the waffles and sautéed mixture.

The morning of,

  1. Remove tomatoes from the oven, pull the peels off, and dice.
  2. Poach eggs one at a time, warm waffles in the oven, and warm the sautéed mixture in a large sauté pan and add the asparagus to quickly cook.
  3. Re-warm all the poached eggs in the hot poaching water. Put veggies on a plate and deglaze the pan with the balsamic vinegar and then add in the maple syrup and olive oil, mix, add the veggies back in.
  4. Plate ¼ of a waffle on each plate, put a small handful of salad greens on each waffle, place hot veggies on top, top with a poached egg, and grate large shards of Parmesan over everything to finish the dish.
  5. Serve.

Waffles: Preheat waffle pan. Add the drained and rinsed white beans to a small pot with the chicken stock and thyme. Season with salt and pepper and bring to a simmer over medium high heat for five minutes to release the thyme’s flavor. Remove from heat and cool to room temperature. Meanwhile in a large mixing bowl combine the flour, sugar, baking powder, and ½ teaspoon of sea salt (1/4 tsp if using table salt). Add the beans and their cooking liquid to a food processor and pulse to puree. Add the eggs, milk, and olive oil to the bean mixture in the food processor and puree until smooth. Add in the flour mixture and pulse until just combined. When griddle is hot, add about ½ cup of batter to it and cook until the waffle is golden brown and crisp all over. Let cool on a cooling rack completely and then store in a zip lock bag in the fridge. If immediately continuing on keep these warm in the oven on a baking sheet.

Tomatoes: Preheat oven to 450F. Cut roma tomatoes into three wedges and remove the core, juice, and any seeds. Place tomatoes face up on a baking sheet, sprinkle generously with salt and the thyme, and lightly drizzle with extra virgin olive oil. Place tomatoes in the 450F degree oven for 10 minutes and then flip the oven off and leave the tomatoes in overnight to finish roasting. If not doing this the night before, roast the tomatoes in the oven for 20-25 minutes at 450F.

Vegetable mixture: Cut bacon into ½ inch pieces and add to a large sauté pan over medium high heat. Stir occasionally so both sides cook and then after about five minutes add the onions and mushrooms and sauté until the mushrooms have browned and onions are transparent and beginning to brown. Add the garlic and cook for 1 minute. If continuing on add the asparagus and finish the dish as described below. Take mixture off the heat and transfer to a Tupperware to store in the fridge until morning.

Morning of: Fill a large stockpot with 1½ quarts of water and ¼ cup of vinegar over high heat. While water is heating, remove tomatoes from oven, peel, dice, and add to mushroom and onion mixture. Add this mixture to a large sauté pan over medium heat. When water for poaching is almost simmering, (when the bottom of the pan is covered with bubbles) crack and egg into a small dish, stir the water to make a mini funnel in the middle of the pan, and get the egg as close as you can to the water and gently slip the egg into the “funnel.” Let cook for about four minutes and don’t worry if some of the egg whites turned into wispy threads—it’s ok! Once egg is cooked remove it from the pot with a slotted spoon and dip it into a bowl of cold water to stop the cooking and rinse off any vinegar. Place egg on a plate and poach the other eggs in the same manner.

While poaching eggs, turn oven to 200F and reheat the waffles on a baking sheet. Add asparagus to the vegetable mixture to cook and stir occasionally. Once all of the eggs are cooked, turn off the heat of the poaching liquid and place the eggs back into the pot to warm them (you will not taste any vinegar if you do this). Remove vegetable mixture from the pan and place on the plate that had the poached eggs. Place pan back onto the heat and add 3 tablespoons balsamic vinegar and scrap up any of the pan bits. Then add a round tablespoon of maple syrup and two tablespoons of extra virgin olive oil. Mix together and add the vegetables back into the pan and toss to coat.

Plate ¼ of a waffle on each plate, put a small handful of salad greens on each waffle, spoon hot veggies on top, top with a poached egg, and grate large shards of Parmesan over everything to finish the dish. Serve and eat slowly—you won’t want it to end! ;)

3.12.2010

Roasted Asparagus with Lemony Quinoa and Mushrooms

Spring is here! Well, not technically according to the calendar, but the snow has completely melted, I hear birds chirping frequently, it rained all of last week, and it was a balmy 52 degrees Fahrenheit today. Back in February, Scott and I mad a bet on when the first day of snowless ground would be. He optimistically bet March 2nd and I optimistically (for me anyway) bet March 10. Turns out I was spot on! I think as the winner of this bet I’m going to have Scott either give me a massage or make me some Compost Cookies. I’ve never had these cookies before but they sound terribly intriguing. You simply add in three cups of whatever you want to get rid of. For example, I have some old Chex mix and pretzels that would definitely be added to the cookie dough, along with a bag of butterscotch chips that I bought when I thought I was out and then got home to realize that I already had an unopened bag that I had mistaken for chocolate chips. Oh, and of course, chocolate of various forms would be added as well! I’m not crazy people, this may sound weird, but it’s not. After all, the creator of the recipe is the pastry chef for Momofoku Milk Bar, one of the famous Momofuku restaurants in New York City, and ever since the recipe has been made public, people have been going crazy for these cookies, adding such things as Bugles chips and other snack-like oddities and loving the results. But I’ve gotten off track, we were talking about spring before my Sweet Tooth interrupted and perfused all my thoughts. . . hmm, I think it’s clear what I’m going to have Scott do since he lost the bet. ;)
I have decided that spring is officially my favorite season. It is just so reviving and full of new life! Such hope! The sun reappears and tickles you with warmth until you laugh with joy, the birds chirp and twitter as they play hide-and-seek, moving to a new hiding place just as soon as you spot them, and the smell of earth perfumes the air in the morning after a night of rain. You can just imagine the first daffodils excitedly working to push their sunny faces up through the soil. If all is well, they’ll call out to their friends, Tulip and Hyacinth, to get moving and see what awaits them above the darkness of the dirt. Of course, flowers aren’t the only things on the move; fresh herbs and asparagus are soon to follow leading the rainbow parade of summer produce. In fact, asparagus is already making a show at the grocery store, the last three weeks it has been greatly on sale! I’ve been buying some every time I go and making it in all different ways with nearly every meal. One of our favorite meals was roasted asparagus with quinoa* and lemony mushrooms. Thanks to the generous amount of lemon, the flavors of it are so bright and peppy they put a “spring” in your step! (Oh DEAR, I am so sorry for that pun, it was very bad indeed, but my nerdy side won’t let me delete it--forgive me!) We first enjoyed this meal, sans the asparagus, the very first time I cooked with quinoa. We love how cooking the quinoa in chicken stock brings it extra flavor and then tossing it with the lemon and garlic juices used to marinate the mushrooms gives the dish a nice “jolt” to make you sit up and pay attention to what’s on the plate. I hope you enjoy this dish as much as we do and that it can get you all revved up for spring and boost you out of winter’s dreary funk. This dish is also very easy to prepare so if you want to get outdoors and not spend the whole day cooking, you can!

*Quinoa (pronounced keen-wah) is native of South America and was cultivated by the Incans as far back as 3,000BC. While quinoa looks and cooks like a grain it is actually a seed from the goosefoot plant (apparently named so because the leaves of the plant look like webbed goose feet). Since it is a seed, it has a very high protein content (12-18%), often doubling that of other whole grains. Not only that, but it is a complete protein as it has an almost perfect balance of all eight essential amino acids needed for tissue development in humans. Thus it is quite a popular food for vegetarians. Quinoa also has calcium, iron, vitamin E, and several of the B vitamins. Finally, quinoa has an outer coating of saponin that is quite bitter and prevents birds and other animals from eating it. For almost all quinoa available in the USA this coating has been rinsed off but it is always a good idea to rinse and strain with the quinoa again before use. You can buy golden, red, or black quinoa in the USA.


Roasted Asparagus with Lemony Mushrooms and Quinoa
Inspired by Giada De Laurentiis' quinoa and Nigella Lawson’s mushrooms
Serves 2 (or 4 as a light meal)
For the asparagus:
½ bunch (8oz) of asparagus
extra virgin olive oil
salt
For the mushrooms:
5-6 oz. (about 3 cups) whole button or cremini mushrooms, sliced as thin as possible (1/8th of an inch)
¼ cup (2 fl. oz.) extra virgin olive oil
1teaspoon salt
1 small clove of garlic, finely minced
zest and juice from half a lemon You may want to add this to taste, Scott and I love lemon so we add a bit more than this but your tastes might prefer less.
2 Tablespoons fresh parsley or 2 tsp. dried
½ Tablespoon chopped fresh thyme leaves or ½ tsp. dried
For the quinoa:
1 1/3 low-sodium chicken stock
2 Tablespoons fresh lemon juice
¾ cup quinoa, rinsed well and drained
Parmesan cheese (for serving)
Freshly ground pepper (for serving)

Preheat oven to 400F. Snap off the bottom third of the asparagus stalks, place on baking sheet, lightly drizzle with olive oil, toss together to coat with oil and then sprinkle with salt. Once the oven is at 400F roast the asparagus for 8 minutes, roll them so the opposite side then before touches the pan and roast for another 3-4 minutes. Remove from oven and once cool enough to handle chop the asparagus into bite size pieces.

In a medium saucepan, add the chicken stock, lemon juice and quinoa. Over medium-high heat bring to a boil first and then reduce the heat to a simmer, cover the pan and cook until all the liquid is absorbed, about 12 to 15 minutes.

Toss sliced mushrooms in a bowl with olive oil, salt, garlic, lemon juice and zest, parsley, and thyme. Let marinate for 15 minutes. Add the asparagus and mushroom mixture to the cooked quinoa. You should have plenty of marinating liquid so add enough so the quinoa is nicely coated and reserve the rest to put on a salad or on any extra quinoa that you have left over so that the quinoa can be kept moist in the fridge. Stir to combine and serve warm, at room temperature, or even cold with freshly grated parmesan and cracked pepper.

2.22.2010

The Best Chocolate Tiramisu

On our interview trail Scott and I ate at Bosco’s in Nashville, TN where we had the best tiramisu either of us had ever had. It was my order, and after tasting it I insisted that Scott taste it too. On doing so, he promptly left his mountain of an uber-chocolate brownie dessert untouched to team up on the tiramisu and the sumptuous sauce it rested in. If it wouldn’t have been at an interview dinner, you can bet that we would have taken turns licking that plate clean. Honest, it was that good. Scott said it was the best dessert that he had ever had. In the months that have followed, Scott has joked about ranking Nashville number one on our list just so we can go to Bosco’s and eat their tiramisu whenever we want. He’s said that if we were like the celebrities who fly across the country just to have dinner at their favorite restaurant we would be flying to Bosco’s once a week for dessert. Now, for those of you who know my husband, you know that he is prone to exaggeration so perhaps it’s been so built up in our minds that if we had it again we would be disappointed, but nevertheless it made such an impression on us I resolved to master a tiramisu recipe and my first attempt would be for our Valentine’s Day dinner.

First, I searched the internet to see if Bosco’s would perhaps have their recipe posted somewhere but sadly they don’t, so I searched for hours more comparing and contrasting different recipes. Traditional recipes have raw eggs in them, some just egg yolks, other recipes use whip cream instead of eggs and blend that with the mascarpone. Some cook the eggs as you would in a custard, and some American versions even have instant JELLO pudding and cream cheese! Would a restaurant like Bosco’s serve raw eggs? Restaurants serve beef tartar so maybe raw eggs don’t bother them either? My head spun and I didn’t know what to do so I decided to take a break and check what new recipes one of my favorite blogs had posted recently. There, on the Smitten Kitchen website I read about Chocolate soufflé cupcakes with mint cream. I loved the idea that a chocolate soufflé had the same level of chocolate intensity as a flourless chocolate cake, but wasn’t so dense, instead it was light and porous. As I thought about this new concept, I couldn’t help but think that the texture of these soufflé cupcakes might make them perfect sponges; perfect sponges for say . . . coffee and liqueur? Ding, ding, ding! Yes! Re-energized I returned to my search, settled on a recipe who’s author I trust, and added the ingredients to our grocery list. I made the chocolate soufflé recipe in an 8 by 8 inch pan and cut the cake up into strips and used these in place of the traditional ladyfingers in tiramisu.

We had our tiramisu for the dessert of our “cocky” (as Scott would say) homemade Valentine’s Day meal and it was so good. It was devoured very slowly, partly because we wanted to savor it and partly because I was in shock it turned out so well that with each bite I let the tiramisu rest on my tongue, siphoning out the flavors and textures with the different parts of my tongue to confirm once more what I already suspected from my first bite, that it was better than Bosco’s.Scott raved about it and after a few days he said, “Whitney, I’ve been waiting to say this because I wanted to be sure, but I think that if you took away that amazing sauce that Bosco’s tiramisu was served in, and had the tiramisu alone, your tiramisu would be better.” Yes! Woo hoo! If I ever figure out that sauce, watch out Bosco’s! There’s a new sheriff in town! ;)


Chocolate Tiramisu

Chocolate souffle cake: From Smitten Kitchen

6 ounces (170 grams) bittersweet or semisweet chocolate, chopped
6 tablespoons (3/4 stick) (86 grams) unsalted butter, cut into pieces
Heaping 1/4 teaspoon (1 gram) espresso or instant coffee powder
3 large eggs, separated
6 tablespoons (97 grams) sugar, divided
1/4 teaspoon salt
1 teaspoon vanilla extract

Preheat oven to 350F. Spray and 8x8 inch cake pan with nonstick spray. In a medium saucepan over low heat melt butter and chocolate together being careful not to burn the chocolate. (If you feel uncomfortable doing this try the double broiler method.) Whisk in the espresso powder to the chocolate mixture and remove from heat and whisk until fully melted and smooth. Cool to lukewarm, stirring occasionally.

With an electric hand mixer (with clean beaters!) beat egg whites in a medium bowl until soft peaks form. Gradually add three tablespoons sugar and all of the salt while beating until medium-firm peaks form. Set aside. With the same electric mixer beat egg yolks and the remaining 3 tablespoons sugar until mixture is quite thick and pale, about two minutes. Beat the chocolate mixture into the egg yolk mixture and then mix in the vanilla extract. Fold the egg whites into the chocolate mixture in 3 additions. Pour batter into prepared cake pan and bake for 17-20 minutes until at toothpick inserted in the center comes out with moist crumbs attached.

Tiramisu: Adapted from David Lebovitz

Makes four large servings or six smaller ones

**This recipe uses raw eggs which is the traditional way of making tiramisu. If you have concern, be sure to use very fresh eggs. As David Lebovitz puts it "ones that you practically stuck your hand in the chicken and plucked out for yourself." As I don't have chickens I can not do this, but I've used Eggland's Best brand of eggs twice now for tiramisu and they've worked great! Also, upon making this tiramisu a second time for my inlaws, Eggland's Best eggs were sold out at my grocery store and while looking for a suitable substitute I came across pasturized eggs which can be used for any raw egg recipe with no fear of salmonella. These eggs worked well though I'm convinced it took longer to beat the egg whites into peaks.

1/2 cup espresso, room temp. (I made this using the same instant espresso powder used in the cake above)

2 tablespoons dark rum (I used 1 teaspoon of rum extract)

1 tablespoon ameretto or cognac

2 large eggs, separated, at room temperature

pinch of salt


7 tablespoons (90g) sugar, divided


1 cup (250g) mascarpone


1 recipe chocolate souffle cake


unsweetened cocoa powder, for serving

Mix together espresso, rum, and ameretto. Don't be afraid if it tastes strongly of alcohol now, it should be this way and it will tone down when combined with the other ingredients.
In a bowl with an electric mixer beat the egg whites with a pinch of salt until they begin to get stiff. Beat in half the sugar until stiff peaks are able to form. In another bowl beat the egg yolks with the remaining sugar until thick and light colored, about three minutes. Beat in the mascarpone by hand with a spatula or whisk until no lumps remain. Fold in half of the egg whites into yolk mixture and then the other half until just fully incorporated.
Slice the chocolate souffle cake into 3 inch by 1 inch strips. On a serving dish, in a glass, or in the cake pan (whatever works for you!) line up the cake strips and pour the espresso mixture over the cake until the cake is soaked. Place large dollops of the mascarpone mixture over the chocolate cake and smooth into an even layer with the back of a spoon. Repeat these layers (cake, pour espresso, spread mascarpone mixture) one or two more times depending on the size of your serving vessel. This will keep in your fridge overnight just fine if need be. When serving sift cocoa powder over top. I hope you enjoy it as much as we did!


2.06.2010

Risotto Cakes


Oh Happy Friday! This week has been a great week for Scott and I and this weekend is going to be just as great! My parents and brother are coming down to celebrate my birthday and I am so excited to see them! I’m excitedly planning the menu for a brunch on Saturday when they get here and then for supper we’re going out to eat at my favorite restaurant in town. Then, after they leave on Sunday, Scott and I are going to my boss’s house for authentic Raclette, which I haven’t had since my first night in France (believe me, that meal set the tone for the rest of my time in France and my new found love of good cheese). Then of course, there’s the Super Bowl and the parties that go along with it which presents yet another opportunity to experiment a new recipe and make something yummy! (By the way, I recommend this recipe for a Super Bowl party--it's the best carmel corn I've ever popped into my mouth.) Yes, though it will be busy, I daresay it should be quite a good weekend and I am very much looking forward to it!

In the meantime though, I wanted to quick give you this recipe just in case you would be making a certain Aged Cheddar Cheese Risotto this weekend or maybe for Valentine’s next weekend (!), and end up with some extra left over. Trust me, if you have left over risotto, any kind of risotto, not just this cheddar cheese kind, it does not work well to simply reheat and eat. It’s just not near as good! But, it can be just as good as the original, or, gasp, better if you transform it to fried risotto cakes. They are so good! Picture this: a crisp, light crunch on the outside gives way to a warm, cheesy, soft, smooth, melty, bath for your tongue. Hello! Can you say “yum!”? Ok, enough with the dramatics, I’ll get on to the recipe.

Fried Risotto Cakes

Like I said before, this works well with any kind of risotto, even a sweet dessert kind. If you’re doing this with a savory one, that does not have cheese as a main ingredient, many people stick a cube of mozzarella (or other cheese of choice) inside the risotto ball/cake so they get that wonderful melted cheese on the inside. The making of the risotto cakes is pretty quick, easy, and straight forward which is another reason why I love it. In ten minutes you can have a delicious meal or appetizer at the ready that is sure to impress. Serve with a good tomato sauce or over a salad of mixed spring greens with a balsamic vinaigrette.

Serves 4 as an appetizer, 2 as a meal

2 cups refrigerated leftover risotto

2/3 cup flour

2 eggs, beaten

1 cup bread crumbs (I recommend Panko to get that light, crispy crunch)

Olive or canola oil for frying

Preheat the oven to 350F. Line a baking pan with paper towels. Form the cold risotto into 2 ½ inches long and ¾ inch thick patties using wet hands. Put the four, eggs, and bread crumbs in separate shallow bowls. Coat cakes first with flour, then with egg (let excess drip off), and then with the breadcrumbs. Transfer to wax paper and repeat with the remaining cakes.

Heat 3 tablespoons oil in a 12-inch heavy nonstick skillet over moderately high heat until hot but not smoking, then sauté cakes in batches, turning over once, until browned, 5 to 6 minutes total. Transfer with a slotted spatula to a paper-towel-lined baking pan and keep warm in oven. Heat more oil if needed and sauté remaining cakes in same manner.

1.29.2010

Hello! How are you all faring this winter? Last week Scott and I finished our interviews for his residency and our whirlwind travels around the country are now done! I can now cook (yay!) and buy a gallon of milk without wondering if I should have bought a half-gallon or if the expiration date is far enough out that it will still be good when we came home from wherever his interview was that week. It was actually a good experience though, and on this last trip to Denver, Seattle, and Portland, we managed to squeeze in some fun, despite Scott naming the trip on our Expedia itinerary “The Trip of the Century” (all three cities in one week and five different hotels, yikes!).

We went skiing in Colorado and I did my best to teach Scott how to ski. I tried to take it slow and easy with him showing him the “pizza wedge” and other tricks to slow down, but he thought he knew better. Perhaps he got a little over-confident when he successfully made it off the chairlift, because he took off, shooting right by me, on our first run down the mountain. Well, he lasted about twenty feet before he went tumbling head over heals for another twenty losing both skies and a pole! Poor guy, I could not stop laughing at him and how utterly predictable it all was, as I skied down to him gathering his skies and pole along the way to help him “reassemble” himself. The day included many other falls for Scott, like one when he got stuck in the trees,

or the one when he bent his pole in half, and the one where he was going so uncontrollably fast that when he fell he slid down the hill 60 feet from where his ski had come off and received a compliment from the guy who retrieved his ski saying that his fall looked “awesome, like an atom bomb went off.” Thankfully Scott did not receive any injuries (though he was terribly sore during his interview the next day), and by the end of the day his skiing was much improved, not falling once on our last two runs down the mountain.

The rest of the trip managed to be fun as well despite it being a "business" trip with Scott’s interviews and my meeting with realtors. Near Pike’s Place market in Seattle we found a spice shop that had hundreds of different exotic spice blends and pure spices from all around the world. I purchased some pink peppercorns, dried edible roses, a tandoori spice mix, and gomasio.


Scott and I also ate at a restaurant (the picture above is the view from our table) where a scene from Sleepless in Seattle was filmed, attended our first wine tasting, had an excellent supper at Delancy (the restaurant of one my favorite bloggers, Molly Wizenburg of Orangette), and I hiked through the rainforest outside of Portland to some gorgeous waterfalls.

But it is so nice to be home now! Despite the freezing cold and blizzards, I do like it. There is something peaceful about sparkling bright white, piercingly cold days. For me they have a calm quietness to them that I appreciate. It is on days like these, that I just want to be a hermit inside our house and crave something homey, comfy, and totally delicious. One of the first things I made upon returning was Aged Cheddar Risotto. I posted a picture it last spring on this blog and promised to tell you about it later when I “had more time.” Well, now is the perfect time! It is a warm, flavorful, wonderfully cheesy, risotto and it is so good. In my opinion, macaroni and cheese has nothing on this. The risotto’s texture is just so smooth and creamy! Combine that texture with an aged cheddar cheese and you’ve reached a whole new level of goodness.


*There are more pictures of our trip posted below the recipe.

Aged Cheddar Cheese Risotto

This recipe has been adapted from Nigella Lawson’s Cheddar Risotto. I have found that using an aged cheddar cheese, with its extra sharpness and depth, gives a lot fuller flavor than an ordinary cheddar. I’ve also omitted the chives per Scott’s request and replaced them with peas and added a sautéed chicken breast as well. By all means, make this how you would best like it; chives or no chives, with or without chicken, it is your choice. This is not meant to be a fussy recipe that must be exactly constructed. You must simply pick a worthy cheddar cheese (I’ve tried this with gruyere and it was not as good), keep it very simple with very few add-ins (lest your dish becomes clumsy and the cheddar flavor muddled by the crowd), and add plenty of chicken/vegetable stock so the risotto can avoid clumpiness and be properly smooth and creamy. Follow these tips and you’ll be golden.

Serves 4

1 Tbsp butter

1 Tbsp canola oil

2 baby leeks or one large leek or 2 fat scallions, finely sliced (I have substituted ¼ of an onion or 1 shallot for this and it seemed to work fine)

1 ½ cups risotto rice (Arborio to be exact, but I find this short grain rice painfully expensive so I cheat and use medium grain white rice and this works fine. Do not use medium grain brown rice! I tried and it’s a no go.)

½ cup white wine

½ teaspoon Dijon mustard

5 cups hot chicken or vegetable broth

1 cup chopped aged cheddar cheese (I use Kerrygold Reserve Cheddar Cheese)

½ cup peas, thawed if frozen optional

2 Tbsp chopped chives optional

4 chicken breasts optional

Melt the butter and oil together in a large saucepan over medium heat. Cook the baby leeks (or whatever substitution you have) until softened. (Or until turning golden brown in the case of the onions.) Heat stock in a smaller saucepan to have at the ready.

Add the risotto rice and stir for about three minutes until the rice turns transparent around the edges. Then add the wine and mustard, stirring until the wine is absorbed.

Spoon in two ladlefuls of the hot stock and stir the rice until stock is completely absorbed. After a few minutes that stock will be absorbed and you can add your next two ladlefuls. Continue stirring and let stock absorb again. Keep repeating this process for about 25 minutes until rice is tender.

After you last stock addition, before all the stock is absorbed, add the cheese and stir vigorously until the cheese melts. Not only does this melt the cheese, but it also releases starch from the rice that will give the risotto that wonderful creaminess. Check the consistency, if you think it looks like the perfect consistency add more stock to thin it out because it will thicken by the time you get it on your plate and are ready to eat. The risotto should be able to flow and should not hold its shape. Stir in the peas if using, spoon out onto plates, top with the sautéed chicken breast and chives (if using), and dig in!

Please fit Pillow, you have to! I can't sleep without you!
It's in! Barely. Thank goodness!

Scott, master skier, King of the mountain.

Myself, I managed not to fall once the whole day! It helps when you stick to the greens ;)

This Seattle icon was a block away from our hotel so we did our duty took a picture of it.

Walking along the Puget Sound on our way to the market.

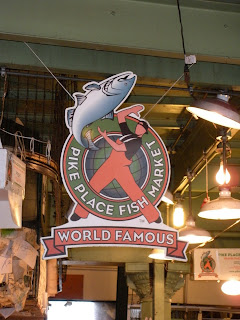
Umm, the sign basically says it all.


Eye-catching produce at Pike Place market.
Watch out! This fish will "jump" out at you if someone behind the fish counter sees you standing close by and thinks you could use a good startling.

Hooray for crêpes! Especially for giant ones :) at a crêperie in the hip Nob Hill neighborhood of Portland.

1.01.2010

A delicious, guilt-free "Carrot Cake" Bread


A few months ago a coworker brought a carrot cake to work from a local, organic foods store that has quite a good bakery. This cake was beyond rich, with a full inch of cream cheese frosting on top and a half-inch down the sides and in between the cake layers. I liked cake, but the fact that the baker seemed to have no qualms in putting 2 pounds of cream cheese on six inch round cake gave me an uneasy feeling about what else lurked inside the cake, it was the same feeling you might get eating Mystery Meatloaf at your school cafeteria. My conscious wouldn’t allow me to continue eating the cake and I was left unsatisfied. This experience taunted me for the next week. It had awakened a craving in me for carrot cake that could not be quenched until I had another, more trustworthy cake. The more I thought about it though, the more I realized that what I like about carrot cake has little to do with what makes it decidedly unhealthy. I love the flavor that the warm spices bring and the mixed texture of the walnuts, the moist cake, and the sweet, and sugary bursts from the raisons. I do like the contrast of the cool tang of the cream cheese against the cake so that had to stay in some form, just maybe not in such egregious amounts. Knowing all of these flavors could be accomplished in a much healthier form, I set out to construct my own, feel-good, carrot cake. In the end however, instead of making an elaborate, time-consuming layer cake, I decided to make a simple quick bread that could be dressed up as breakfast cake if spread with a (sane) layer of cream cheese frosting or simply sliced as bread and spread with maple-walnut cream cheese. Yum!

Since I decided not to make a dessert cake, I reduced the amount of sugar by two-thirds and added ½ cup unsweetened applesauce to give it a little natural sweetness and to make up for the moisture that would be lost by taking the sugar out. I also reduced the amount of oil/butter as the carrots themselves contribute much of the moistness that I love about carrot cake. I felt I had the right, since I was making a bread, to sub-out the majority of all-purpose flour for whole-wheat flour. The end result completely satisfied my craving, and when a few slices were brought to work for a taste test, my coworkers heartily agreed that I had fulfilled my mission of creating a healthy carrot cake bread that tasted just as good as the cake, if not better.

"Carrot Cake" Bread

¾ cup whole-wheat pastry flour

1/2 cup all-purpose flour

1 teaspoon baking soda

¼ teaspoon salt

1 teaspoon ground cinnamon

¼ teaspoon allspice

1/8 teaspoon ground cloves

1/8 teaspoon ground ginger

¼ cup canola oil

¼ cup plus 2 Tbsp. firmly packed light brown sugar

2 large eggs

½ cup natural applesauce

1 Tbsp. real maple syrup (optional)

1 Tbsp. plain yogurt (optional)

½ teaspoon vanilla

1 1/2 cups finely shredded carrots (about 2 medium carrots)

1/4 cup plus 2 tablespoons chopped walnuts

1/4 cup raisons, plumped by soaking them in hot water for five minutes (optional)

Directions

Preheat the oven to 350 degrees F. Spray bread pan with nonstick spray.

Toast walnuts in a sauté pan over medium heat or on a cookie sheet in the 350 degrees oven for 5 to 10 minutes. Careful not to burn!

Sift together the first 8 ingredients. In a large bowl, whisk the oil, brown sugar and eggs until well combined. Whisk in the applesauce, yogurt, maple syrup (if using), vanilla and carrots. Add the dry ingredients and mix until combined. Stir in 1/4 cup of the chopped walnuts.

Pour batter in to pan and, if you are not frosting the top of the bread, sprinkle the remaining two tablespoons of walnuts on top of the batter. Bake in the oven for 55-60 minutes until a toothpick inserted in the middle comes out clean. Cool on rack and enjoy! Maple walnut cream cheese goes great!

If you would like to frost the top of the bread try this frosting:

4 ounces 1/3 fat cream cheese (recommended: Neufchatel)

3/4 cup confectioners' sugar, sifted

1/2 teaspoon finely grated lemon zest

With an electric mixer, beat together the cream cheese, confectioners' sugar and lemon zest until smooth and creamy. Frost the cooled bread and sprinkle with the remaining 2 tablespoons chopped walnuts. Store in the refrigerator.